Compost at home or use green waste bin?

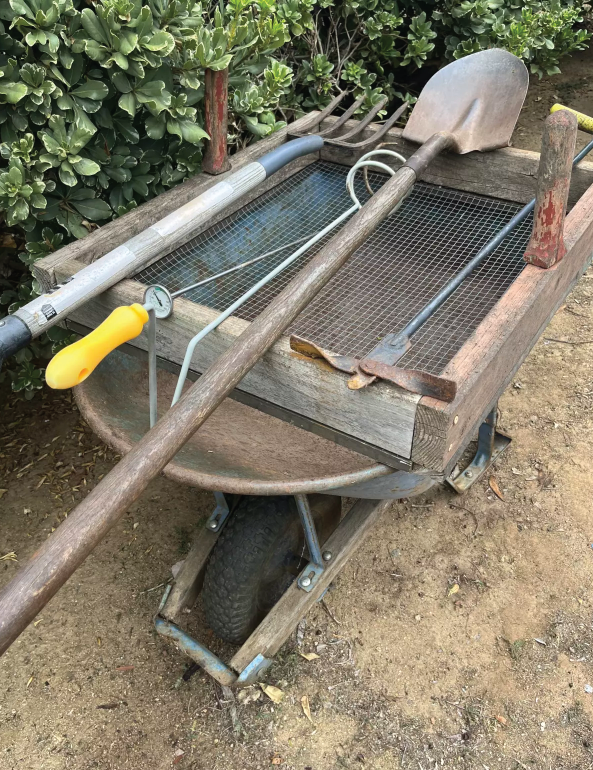
These tools are helpful in tending a hot pile: a shovel, a pitchfork, compost turners, a compost thermometer and a sifter frame. (Nate Northup)
Why not both? Create your own spot for kitchen scraps; use bin for overflow
(This article originally appeared in the San Diego Union-Tribune November 11, 2023)
Compost at home? Don’t I have to send all my kitchen scraps to the curb in my green waste bin? Nope! They don’t ALL have to go into your green bin. They just can’t go into the landfill, according to the Solana Center for Environmental Innovation.
SB 1383 is the 2016 law that bans from landfills the organic waste that has been generating 20 percent of California’s climate change-inducing methane (Learn more at CalRecycle.ca.gov). Your kitchen scraps and yard trimmings can eventually power your waste hauler’s trucks or get composted at the City of San Diego’s Miramar Greenery. But they don’t have to. Considering that the Greenery is already overwhelmed and must be replaced eventually with a vastly larger composting operation, why not divert what you can to your own compost operation? Keep as much as you need and green bin the rest.
Think of the advantages to composting at home: reduce odors and bugs in your green bin and spend less on food that isn’t eaten. (The U.S. Department of Agriculture figures that more than one-third of all food in the U.S. is wasted.) Avoid treks to the nursery or Home Depot to buy commercially produced organic material. Additionally, your waste hauler plans to charge less to households producing less green waste. Most important, it’s fun, satisfying, environmentally friendly, and example-setting for friends, family and neighbors. Why not turn your yard and kitchen scraps into your own nutrient-rich soil amendment or mulch?
Don’t know how to get started? Start small. There is no single “best” method to compost at home. At least one of several methods can work for you.
Our region offers many home composting resources. Solana Center for Environmental Innovation, the City of San Diego’s Office of Environmental Services, and the County of San Diego’s Department of Public Works each details several methods, offering a wealth of ideas and suggestions along with tips and troubleshooting. The most popular composting methods include active (“hot”) or passive (“cold”) piles, worm composting, and a direct-bury method. A countertop mini-composter is another option.
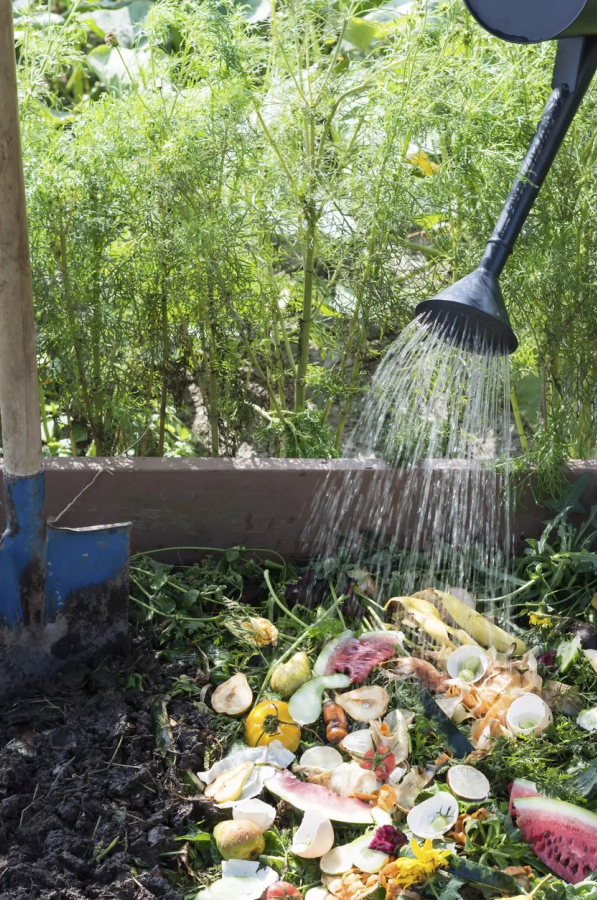
 If you have the space, try a “hot” pile. Use any round or three-walled structure, at least 3 by 3 by 3 feet, placed on level bare soil, close to a water source. You’ll need only four ingredients: nitrogen (“greens”), carbon (“browns”), air and water. Properly proportioned and attended, your hot pile’s internal temperature will quickly rise to 130 degrees and up and stay there for several days, ready to harvest after several more weeks of gradually slowing microbial activity. (Commercial tumblers are smaller, resulting in a cooler, slower decomposition process.) A hot (“active”) pile requires a few tools, along with regular moistening and turning, but yields loads of satisfaction.
A passive or “cold” compost pile mimics a forest floor, using the same four ingredients, but can be smaller, requiring no “bin” structure. Proportions are less important. You can ignore your cold pile over the many months it will take to decompose, depending on ambient temperatures and whether you choose to turn it, moisten it, or add green waste.

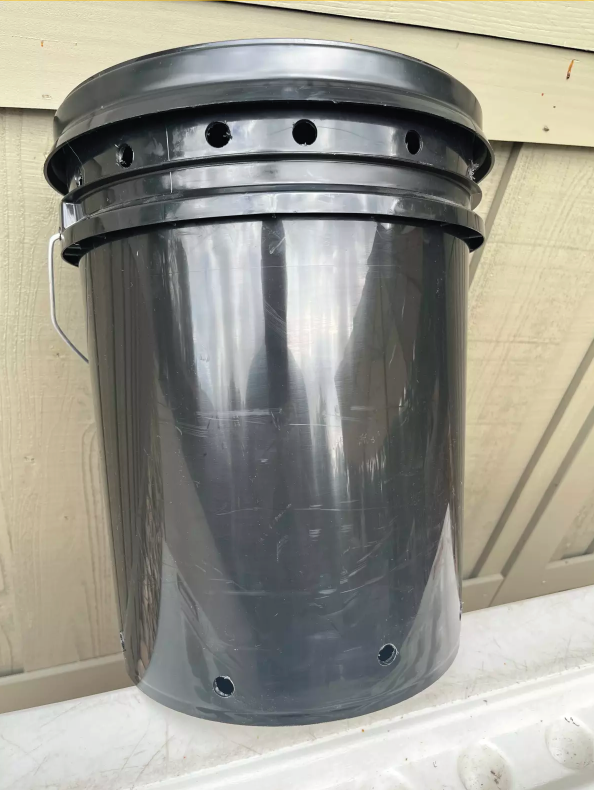
A 5-gallon screw-top bucket can be aerated for use as in-ground worm bin. (Nate Northup)
Worm composting (vermicomposting) is perfect for small spaces and limited kitchen waste. You can buy or make your own bin, as simple as a 5-gallon bucket! You will re-home at least a pound of red wiggler worms to a layered bed of damp shredded paper or coconut coir and coffee grounds or fine sand, to which you add your scraps. Avoiding extreme temperatures and locating your bin away from disturbing vibrations, these prolific little critters display voracious appetites and can turn your kitchen scraps into super-rich, nutrient-balanced worm castings in no time.
“Direct bury,” or trench composting, is pretty much as it sounds. Dig a trench in your yard or garden deep enough to backfill at least 6 inches over your kitchen scraps near your intended planting area. Include paper towels or other “browns” but avoid meat or dairy products to disinvite digging pests. Keep the area moist, but not wet, and wait four to six weeks to plant. An advantage to this method is that the resultant worm castings are right where you need them.
A variation on the direct-bury method involves a “keyhole garden.” This is simply a raised garden bed assembled from repurposed materials surrounding a rectangular or wedge-shaped cutout giving easy access to the center of the garden where a wire cage serves as your compost pile.
If you generate only a few kitchen scraps and want to keep your operation completely indoors, consider a countertop electric mini-composter, although it comes with a $300 to $500 price tag.
Try any or all of these methods and enjoy the satisfaction of doing something healthy for our planet.
Northup is a retired government litigation lawyer. He is a Solana Center-certified Master Composter and has been a Master Gardener since 2020.

